HOWTO Query MSSQL And Send HTML Email Using Powershell
Before I start this tutorial I must preface this with a warning: The amount of coding in this tutorial is so minimal it is almost sexually exciting. I have found that Powershell is such a powerful scripting tool that you can accomplish tasks that would take 100’s of lines in a lot less. This tutorial is an amalgamation of several different tutorials I found online when I wanted to have a crack at emailing a report to a client. As it turned out it is now run daily as part of our scheduled tasks.
Powershell is what you would call the successor of Command Prompt but more is akin to a *nix command line tool like bash. As it seems that everything is going .NET these days it should be no surprise that Powershell also leverages the .NET Framework. If you have used C# or VB.NET before the kind of objects you will be working with will be quite familiar. I am running Powershell 2.0 on the Windows 7 RTM (which comes preinstalled) but Powershell 1.0 will also work with this tutorial.
Getting A Working Connection String
The first thing we want to do is form our SQL query which will be the data that we will email to our client. To do that in Powershell we are going to need a connection string. A handy little tool that I use to grab a connection string is the Data Link Properties file. You can just create a new file somewhere called:
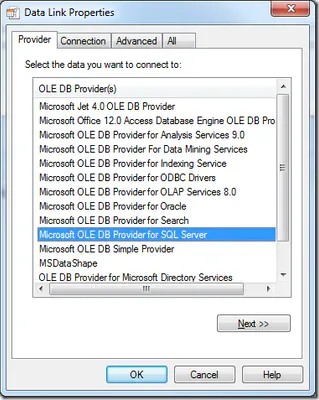
Test.udlYou will need to be able to see all file extensions to create the file. Open the file using Windows Explorer and go to the Provider tab. Once there you need to select Microsoft OLE DB Provider for SQL Server.
Once that has been completed we need to go to the Connection tab and enter our server details. If you have entered the correct details (Server Name, User and Password) you should now be able to click the Select the database on the server checkbox which will show a dropdown list of available databases. For the purpose of this tutorial I have chosen the AdventureWorks database.
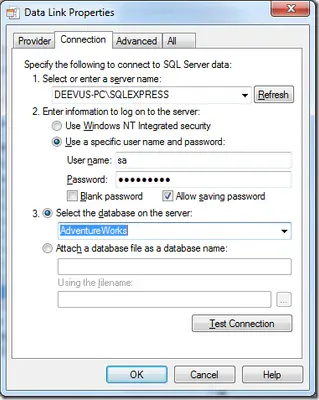
Please also note that I have checked Allow saving password that will make it so we don’t have to enter it manually later. In my case, since the script is sitting on a work server there is no risk in leaving the password as plain text in the file.
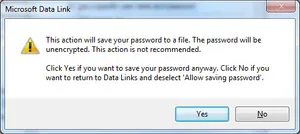
Once you have completed all of the above, click Ok. You will get a warning about saving the password to which you can just click yes. Obviously in a less secure environment on a production server you may want to consider other options for storing your password, but that is beyond the scope of this tutorial.
Now that the file (Test.udl) is saved if you open it in your favourite text editor you will see something like this (I have removed my server password for obvious reasons):
[oledb]
; Everything after this line is an OLE DB initstring
Provider=SQLOLEDB.1;Password=*******;Persist Security Info=True;User ID=sa;Initial Catalog=AdventureWorks;Data Source=DEEVUS-PC\SQLEXPRESS
All we actually need is the text on line 3 excluding the first segment Provider=SQLOLEDB.1; which gives us our working connection string!
"Password=*******;Persist Security Info=True;User ID=sa;Initial Catalog=AdventureWorks;Data Source=DEEVUS-PC\SQLEXPRESS"Querying SQL Using Powershell
Now that we have a working connection string, we can begin coding our Powershell script. The first thing we need to do is create our connection object:
#Connection Object
$cn = New-Object System.Data.SqlClient.SqlConnection(
    "Password=********;Persist Security Info=True;User ID=sa;Initial Catalog=AdventureWorks;Data Source=DEEVUS-PC\SQLEXPRESS"
)
Then we create our query string:
$q = "SELECT TOP 50 * FROM HumanResources.vEmployee ORDER BY LastName"We also need an Adapter and a DataSet to gather and hold our data. Once you have gathered the data using the SqlDataAdapter you put the results into the DataSet:
#Data Adapter which will gather the data using our query
$da = New-Object System.Data.SqlClient.SqlDataAdapter($q, $cn)
#DataSet which will hold the data we have gathered
$ds = New-Object System.Data.DataSet
#Out-Null is used so the number of affected rows isn't printed
$da.Fill($ds) | Out-Null
#Close the database connection
$cn.Close()
Creating The HTML Email
So now we have the data that we want to email we need to format it into HTML. Powershell has an inbuilt function called ConvertTo-HTML which automagically turns data into HTML! It is really quite simple:
$emailbody = $ds.Tables[0] |
     Select-Object LastName, FirstName, JobTitle, Phone, EmailAddress, AddressLine1, City, PostalCode |
     ConvertTo-HTML
Select-Object will simply grab the members from the DataSet that we need. As you can see in the above snippet we have grabbed some general information about the employees at AdventureWorks. If you’ve gotten to this point and want to see what the outcome might look like, you can add Out-File test.html to the end of the last line so that it looks like this:
ConvertTo-HTML | Out-File test.htmlThis will save the results to a html file which you can freely view in your preferred browser.
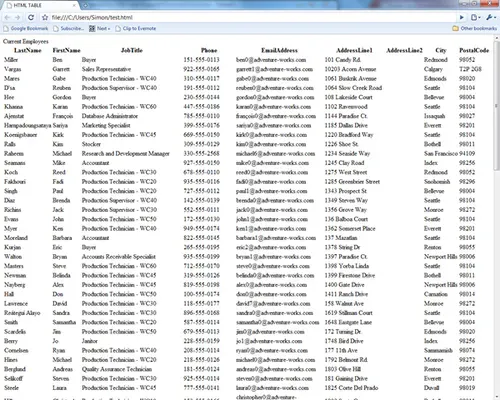
As you can see from your html file (or the screenshot provided) it is not the prettiest markup on the internet. However, there are ways to improve the look and feel of the generated html via the head parameter of ConvertTo-HTML. The head parameter will essential pass whatever you give it to the <head> tags of the HTML. The head of a HTML markup can be used to shape the look and feel of the body of the document, so this way we can pass it some information to make it look nicer.
#HTML Email Styles
$style = "<style type='text/css'>"
$style = $style + "BODY{background-color:#FFFFFF;font-family:Verdana;}"
$style = $style + "TABLE{border-width: 1px;border-style: solid;border-color: black;border-collapse: collapse;font-size:12px;}"
$style = $style + "TH{border-width: 1px;padding: 0px;border-style: solid;border-color: black;background-color:#D3D3D3 }"
$style = $style + "TD{border-width: 1px;padding: 0px;border-style: solid;border-color: black;background-color:#FFFFFF }"
$style = $style + "</style>"
And then the last line will look like this to implement the styles we just created:
ConvertTo-HTML -head $style | Out-File test.html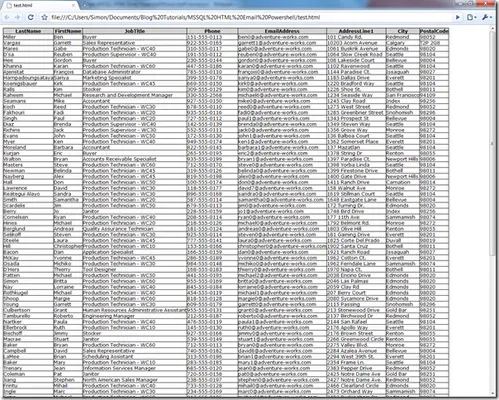
Sending The Email
For the final stage of this tutorial we need to actually send the email. First things first we should create all the variables pertaining to sending an email:
$emailFrom = "deevus@isp.com.au"
$emailTo = "someone@anotherisp.com"
$subject = "AdventureWorks - Current Employees"
Now we form the message using the Net.Mail.MailMessage class.
$message = New-Object Net.Mail.MailMessage($emailFrom, $emailTo, $subject, $emailbody)
#This is needed to make sure it interprets the email as HTML
$message.IsBodyHTML = $true
And the SMTP server using the Net.Mail.SmtpClient class.
$smtpServer = "smtp.isp.com.au"
$smtp = New-Object Net.Mail.SmtpClient($smtpServer)
Finally, like magic, we send the email!
$smtp.Send($message)Before we run the script, make sure you remove or comment out | Out-File test.html, otherwise the email will be blank.
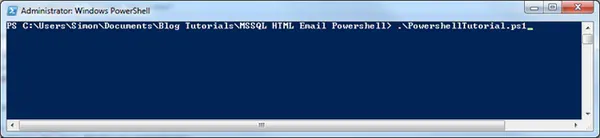
ConvertTo-HTML -head $style #| Out-File test.htmlThen all you need to do is run the script from the Powershell console.
If all is well, your recipient should receive a nicely formatted email sent using Powershell with data from SQL.
Great Success!
Here is the Powershell script in its entirety:
#Connection Object
$cn = New-Object System.Data.SqlClient.SqlConnection(
        "Password=********;Persist Security Info=True;User ID=sa;Initial Catalog=AdventureWorks;Data Source=DEEVUS-PC\SQLEXPRESS"
    )

$q = "SELECT TOP 50 * FROM HumanResources.vEmployee ORDER BY LastName"

#Data Adapter which will gather the data using our query
$da = New-Object System.Data.SqlClient.SqlDataAdapter($q, $cn)
#DataSet which will hold the data we have gathered
$ds = New-Object System.Data.DataSet
#Out-Null is used so the number of affected rows isn't printed
$da.Fill($ds) | Out-Null
#Close the database connection
$cn.Close()

#HTML Email Styles
$style = "<style type='text/css'>"
$style = $style + "BODY{background-color:#FFFFFF;font-family:Verdana;}"
$style = $style + "TABLE{border-width: 1px;border-style: solid;border-color: black;border-collapse: collapse;font-size:12px;}"
$style = $style + "TH{border-width: 1px;padding: 0px;border-style: solid;border-color: black;background-color:#D3D3D3 }"
$style = $style + "TD{border-width: 1px;padding: 0px;border-style: solid;border-color: black;background-color:#FFFFFF }"
$style = $style + "</style>"

$emailbody = $ds.Tables[0] |
     Select-Object LastName, FirstName, JobTitle, Phone, EmailAddress, AddressLine1, City, PostalCode |
     ConvertTo-HTML -head $style #| Out-File test.html

$emailFrom = "deevus@isp.com.au"
$emailTo = "someone@anotherisp.com"
$subject = "AdventureWorks - Current Employees"

$message = New-Object Net.Mail.MailMessage($emailFrom, $emailTo, $subject, $emailbody)
#This is needed to make sure it interprets the email as HTML
$message.IsBodyHTML = $true

$smtpServer = "smtp.isp.com.au"
$smtp = New-Object Net.Mail.SmtpClient($smtpServer)

$smtp.Send($message)